Friday, February 25, 2011

Let's talk Audio/Video...

Alright, so it looks like the Barth is going to be wired for some Audio/Video Action. My brother recently bought a 2003 Jetta with a pretty interesting deck in it that he didn't want, so I offered to take that off his hands for a reasonable price.


The deck has some cool features. Built in 3" LCD screen, 2 RCA outputs and 1 Backup Camera Input. Plays MP3 and DVDs, SD card input, Line in and USB for plenty of flexibility. So it looks like the 8-Track is coming out after all in favor of the new media.

I figure I can run my Droid on Google Maps or Pandora, piped in to the stereo. Movies? Sure I can do that too, and I think I will yank the Dash AC out (pictured below) and replace it with a 21" LCD computer monitor I don't use anymore. Not bad for a back up camera, huh?


So While I have the ceiling down I will run wires for speakers, Backup Camera and all that jazz. I guess I need to figure out a Inverter as well for the Monitor, but that won't be too hard I have a Cheap 300 watt laying around, and that will do the trick nicely. I think I'll hard wire that into the dash switches for easy on/off switching.

For the rear, I will have my old laptop (bad screen and tired battery) mounted in the rear cabinet, running off another inverter or off 110v depending if we are on the road or not. (I wish I kept that 700w inverter from the Aristocrat now...damn) This one will play videos, hook up to WiFi (Pandora, Netflix, Hulu) and output to a 19" LCD (for now until I go larger later...that's just what I have now) and my favorite Altec-Lansing Desktop sub and speakers. I can also bring along a portable external HD with movies and Music from home.

Well that should just about cover it for now. None of this will get put in for a while, need to tackle the other stuff first. But plans are always good... especially since it will be a whiole lot easier to run wires when the ceiling is down, like I said.

Friday, February 18, 2011

The weekend is upon us!!

So we took the valves back that didn't work at Lowe's and I grabbed a couple of carpet samples of what I may put in there... I'm leaning to the multicolored one to bring in the reds, browns and blacks together... but it's also the most expensive too. 2nd on the list is the Berber (center). Both of these will go with the fabric I got from my dad.

IMAG0997.jpg


Then looking through the lights I came across this, it's meant to be down lighting for a deck, but I'm going to use it for the entry steps. I may or may not have it on one of the dash switches, and maybe I'll have it triggered when the door opens... not sure. But it's only 7W 12v so it won't drain the battery very fast, so I may just run it direct from the dash, or run it on the same switch the lit Barth entry handle is on.

IMAG0999.jpg


Last but not least... one in a million! I found the right valves to replace the guts in my winterizing vales. One got a bit torn up getting it out the first time, and the other probably just needed a new seal, but now I have two smoothly operating valves and didn't need to mess with removing the existing pipes/valves. Yay!

I also scored on the bits I needed for removing most everything in the Coach... at McLendon's in Renton, WA (where I found the valves above) I was able to get the right bits on clearance for only $0.13 a piece!! Normal price? $2.49!! So I bought 10. :)

We should be able to get the overhead cabinets out, and most of the ceiling down this weekend... we'll see if I'm able to get any put back up... probably not. We'll just work on getting the old stuff out. I would really like to get the 12v system working, independent of the Generator or Shore power. Need to open up the Converter and sand a few points to hopefully get them working again. The problem is it's not returning the power to the battery directly when you unplug it. There is a relay I see moving alright, but the points may be gummed up or something. We'll see.

Monday, February 14, 2011

Weekend work, and slept in in for two nights, propane woes.

So my wife was gone on a girls weekend, so the boys got some work done on the RV and took it for another drive... some good some bad... well here goes:

I scraped all the purple 1980's tint off, let's a lot more light in and got rid of that horrible purple, weathered bubbled tint. Some came off really easily in sheets, and some was a LOT of scraping with a razor blade, (or 4).

IMAG0980

E and I brought out a heater, a laptop and some desktop speakers to watch a movie and sleep both Friday and Saturday nights. Friday we slept in the twins, for Saturday I found a piece of plywood that worked great to make it into a big King, and we slept the other way (heads to Port, feet to Starboard) That was fun both nights! Sunday we took it out for a little spin to keep everything flowing. Stopped by the Auto Parts store and Grabbed a new filter and a in-line fuel pump to help transfer the fuel up to the mechanical pump after it's been sitting for a while. I think I'll wire that up to one of the switches on the dash, but maybe on a momentary switch instead of a toggle... hmmm. Toggle for now.

Went down to my dad's to visit on Sunday and he showed me a bit about the drain valves that are leaking, I tried to get new guts, but the guy at Lowes was useless in helping, I guessed and it wasn't quite right... back those go. I am trying to replace the guts without removing the valves themselves... they have been there for a while, so I don't want to do more damage trying to remove them than I need to... this will be fun... I think I'll have to go to McLendon's in Renton, they have a MUCH better plumbing selection then HD/Lowes for stuff like this. So I'll snap a picture of the valve body, and bring one of the existing guts with me so hopefully I can get the right one.

He also gave me a roll of excess fabric from one of the jobs he did. I like it a lot, I guess it was something like $80/yard and was imported from Italy. There is not enough to do both the rear cushions AND the dinette... so I'll have to choose one or the other... or... maybe just use this for the tops and sides of the cushions and use a complimentary fabric for the bottoms... I'll have to unroll it and get real measurements, but I think it's about 5-6 yards x (54inches wide) so we'll see. It has a really nice look and feel to it.

IMAG0988

I tried to get a couple gallons of Propane filled to test out the furnace and such... and the fill valve is stuck open so the LP just poured out on the concrete... have to get it replaced.

Well that's about it. Until next weekend (or I get a chance to get out there again.)

Wednesday, February 9, 2011

Plans Plans Plans

Kai, this one's for you to answer your question on Multiply

As you can see in the last picture, I have started to take the ceiling down. The leaks destroyed the ceiling panels from one end to another. I plan to pull the overhead cabinets down, Check for any more leaks, insulate and replace the ceiling panels. They are basically luan with vinyl/fiberglass coating on one side, like you might put in a shower wall, riveted into the aluminum supports then trimmed. The walls in the bathroom need to be replaced as well. These run about $12 per 4x8' sheet so not to bad at all.

After that I may replace the carpeting and pad, paint a few of the interior walls (dining area) to brighten it up a bit (may use paintable wallpaper like this) Remove the paint from the kitchen and dining room drawer and cabinet faces and re-stain them to match the rear cabinets or go a bit darker like 'espresso'.

I will take the covers off the cushions to see if they can be washed without falling apart to get some of the stink out... I'll steam the foam to bring it back to life, and see about re-installing them as is. Some are pretty torn up (hidden in the pictures) so I may sew new covers for the cushions. The Roman shades are going away as well and will be replaced with new curtains. The purpled tint will come off the windows and will be replaced with limo tint again (like I did in the trailer).

I still need to test the LP systems like the furnace and water heater, replace the winterizing valves in the water system that refuse to seal closed. The 12v pump cannot shut off when it's on as there is a constant pressure drop do to these leaks.

Soooo... that is what's needed to get it Camp-able, then we go to the outside where the real fun begins.

Stripping all the paint and polishing the lower half. Stripping the vinyl woodgrain finish and painting the upper section blood red to match the interior. This will also wrap around the front  under the windshield and on the back around the window above the bustle (trunk). The bumpers will also get stripped and polished as well as the hub caps will get brightened up a bit.

Hopefully I can find an awning to replace the one that is missing, and then that would just about do it. Other than the steps I had to rebuild, the rest of the rig is pretty solid structurally, so it just required some tweaking. :)

Oh, and I need to build the slide out to support that rear bed, those cushions were just floating there in the pictures.

Tuesday, February 8, 2011

Got her cleaned and drove it.

My parents came over on Sunday to see the Barth, so I thought I would clean it up a bit. And since I put the new tires on I was anxious to drive it, so I took it out for a couple of test drives... first around the block (Loose hubcap on the front, had to remove it due to a stripped out bolt), then down to the store to get some dip (success!), then later that night I went to Costco, Home Depot and Lowes to return some things. I can't wait to take her out on a trip!

So... since I cleaned her up a bit, I thought it was only right to take and post some new pictures. :)

DSC_5448

DSC_5450

DSC_5451

DSC_5455

DSC_5457

DSC_5459

DSC_5461

DSC_5462

DSC_5463

DSC_5464

Sunday, February 6, 2011

New Tires

So I ended up getting a pretty darn good deal on the tires. breaks down like this:

6 Tubeless Rims, 1 235/85/16 = $80
3 Tubeless 235/85/16 = $50
Dismount, Mount and Balance = $42

Total for 4 new tires for the rear = $172

Funny enough, that is the cost of just one of the front tires alone. Oh well.

Here is a look at the old, dry, cracked, weather checked, about to blow out tires:

IMAG0969

IMAG0970

IMAG0971

Saturday, February 5, 2011

Thoughts on polishing the Barth

So I hit a couple of spots just trying things out...
DSC_5440

then read how I was doing it wrong at Perfect Polish so I will get the right stuff; Stripper and the right grades of polish this summer. But here are a few examples for my inspiration!

Polish Examples (not mine...yet)

Polish Examples (not mine...yet)

Polish Examples (not mine...yet)

Polish Examples (not mine...yet)

I will most likely go this route and do 1/2 polish 1/2 paint. Instead of the blue I would go with dark red to match the interior.

Polish Examples (not mine...yet)

New Wheels and Tires

Snagged a great deal on Craigslist for 6 new 16" wheels and two tires for $80. One tire is a 235/85/16 and the other is a 215/85/16. Mismatched, so the 215 will go in the trunk as a spare for now.

This morning I should be heading down to pick up 3 more 235/85/16 tires with 85-90% tread for another $80. These are tubeless and can be mounted at a normal tire shop versus the split-rim tube requiring wheels and tires that we just replaced on the front.

Sad, if we would have been able to make it home on the front tires... I'm getting 6 wheels, 5 tires mounted balanced for $200, the 2 tires on the trip home costs $400 for tubes and tires alone.

Oh well, $600 for a full set and a new spare is not a bad deal I guess... works out to less than $100/wheel.

Thursday, February 3, 2011

Hello World

Hi.

So now that all of that is out of the way, My name is Mike and I have this thing with restoring old Trailers and RV's. I buy them relatively cheap, and make them look better, work better, and smell better. :)

My first project was a 1966 Aristocrat Mainliner, feel free to read all about the 2 year restoration, then rebuild again on http://66mainliner.blogspot.com

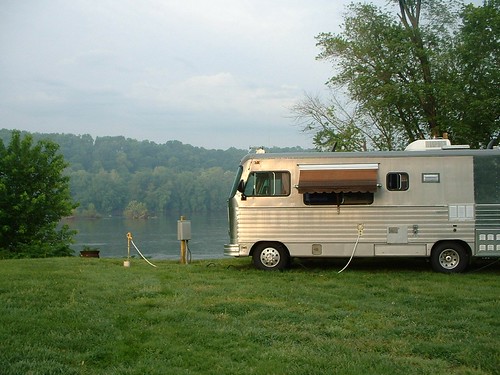
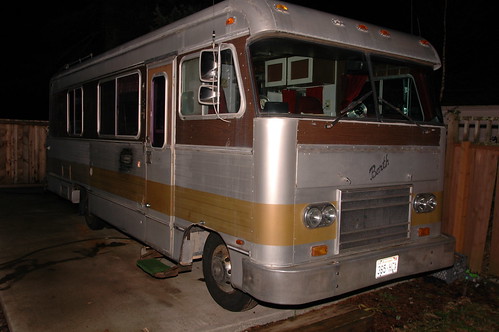
The next project I picked up several weeks ago (1/9/2010) was a 1973 25ft Barth Motor Coach.

This one is going to need some work to get her road worthy and campable, then a bunch more to make it look pretty, along the way I hope it will start to smell better.

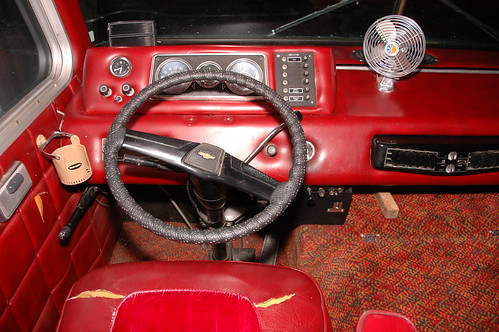
So, this Barth RV is pretty cool (or why would I bother, right?) the construction is the same as a Airstream, the structure and framing is all 1" Aluminum i-beams, and the skin is riveted Aluminum. No rust, no rot. Well, at least with the coach body. The chassis is another story. This runs on a Chevy 1 Ton Chassis, and from what I can tell so far the Motor is a 1972 Big Block 454 (270hp, 390 ft-lb) with a 3 speed Turbo 400 Tranny. Runs and drives great. Just needs a bit of a tune up to get her at her peak. But no trouble getting up and over the pass coming home from Yakima where I bought her.

So far what I've done to bring everyone up to date is:
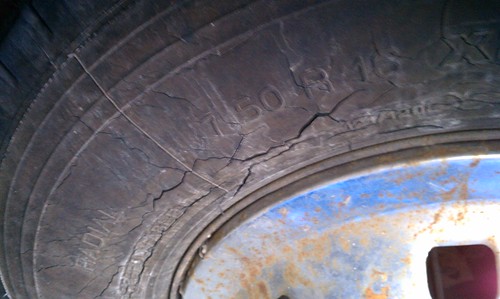
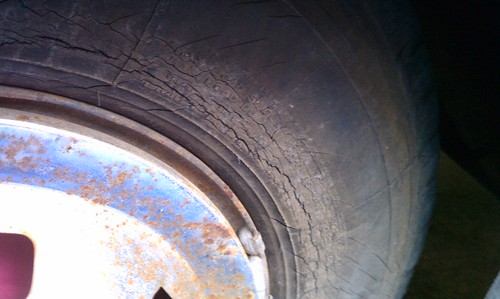
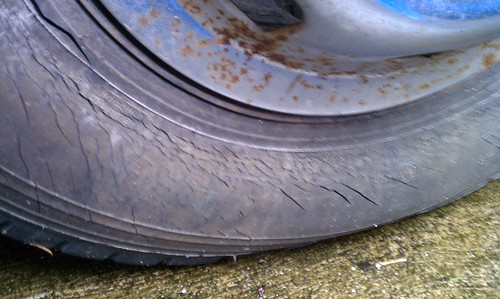
- Installed 2 new tires on the front, (one blew out, and one was on it's way out)
- Installed a new Coach Battery (Deep Cycle RV)
- Rebuilt the entry steps
- Started to tear down the damaged ceiling (water leaks)
- re-connected the water lines to test the system (needs a couple new leaky drain valves in the rear)
- Installed a new vent cover (Square 14x14 ona rounded corner vent)
- Installed a new toggle switch for the forward roof vent
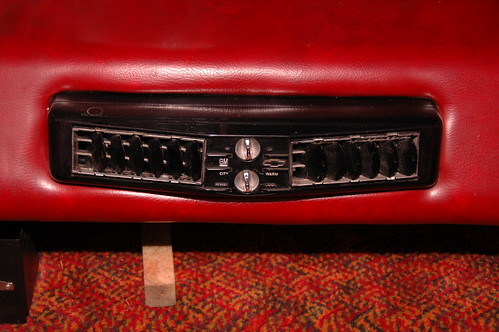
- got the Roof Top AC working (fan needs some TLC still, blows cold!)
- Fixed the door on the fridge (Still need to make a travel lock for it)
- Removed the luggage railings, broken antennae mount, and brackets and patched holes to seal the roof
- Removed the rear luggage rack and installed a 2" hitch ball.
- Replaced the socket and bulb to repair the lighted entry handle
- Started to remove the vinyl woodgrain finish around the windows to prep for paint or polish
- Test polished a couple small sections (I will eventually strip and polish the whole RV)
- Started to remove the purple window tint.
- Removed the old divider doors

so that is just the start to what I would estimate a 6 month project with a little here and there... so follow along as it progresses! I'll try to keep new content as much as possible.

Now, on to the pictures... everyone loves pictures!

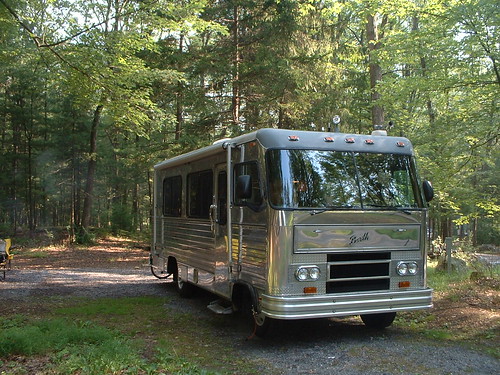
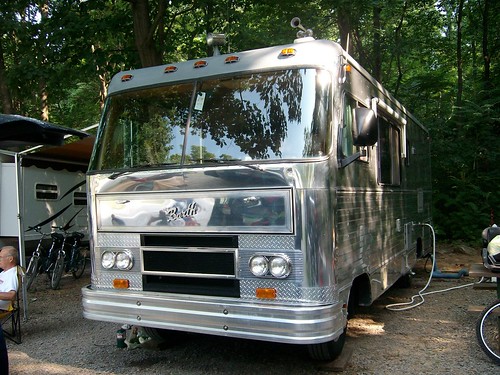
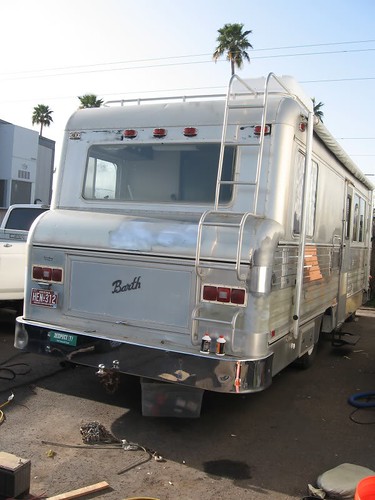
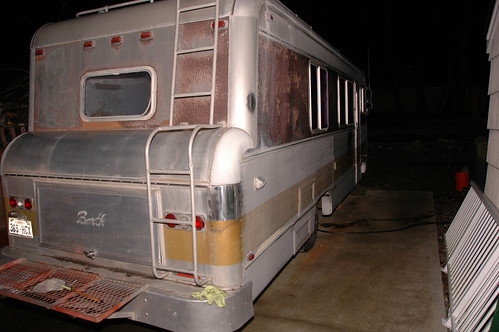
The Yellow and Brown are coming off this summer, the front plate is already gone.
DSC_5442

Again Brown is coming off, that rusty rack is already gone.
DSC_5441

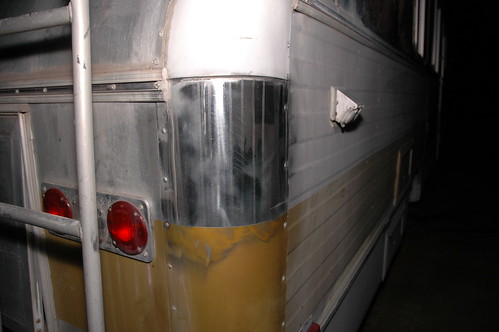
You can see how it will polish up quite nicely! :)
DSC_5440

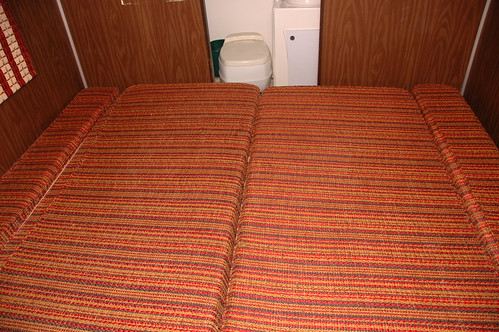
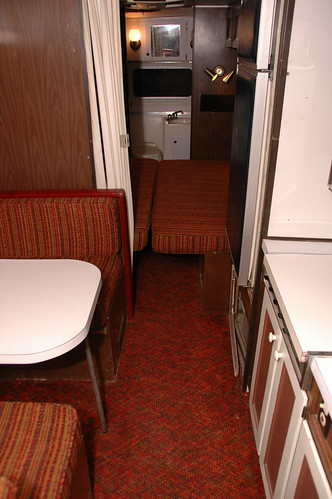
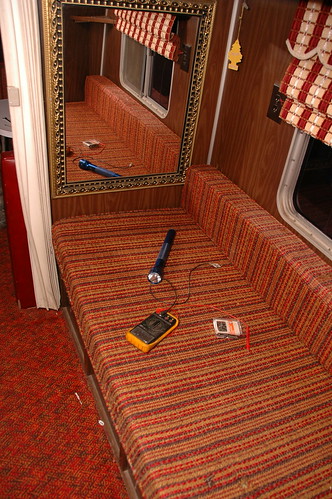
These Twin beds, after a touch of ME will be a large 76"x 84" bed OR twin beds. Thinking of painting or replacing the wood grain walls back here.
DSC_5430

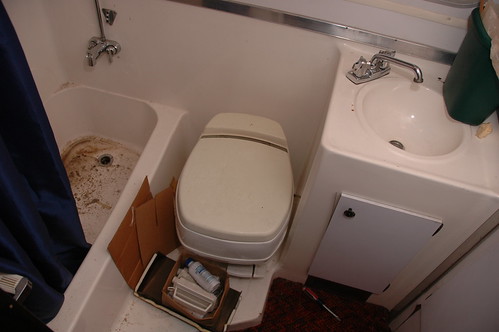
The Tub,Toilet and Sink are all molded fiberglass, and one-piece. Pretty cool. (the dirt in the tub is water and insulation from teh damaged ceiling... cleaned up nicely.
DSC_5423

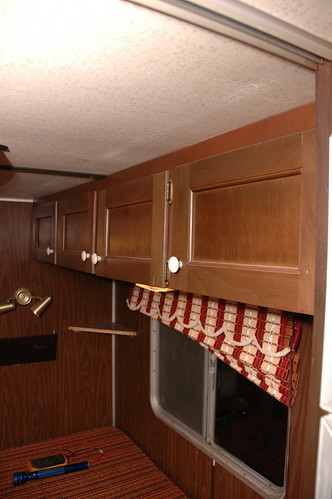
Cupboards are still in nice condition for a 38 year old RV. :) Maybe some Murphy's and scotch brite and she's shine again.
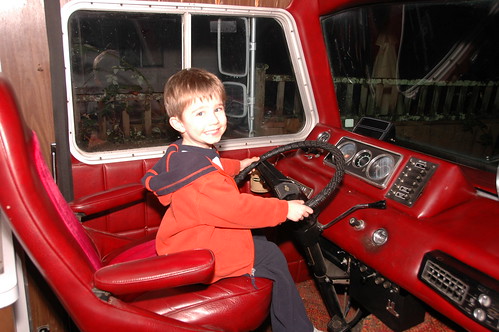
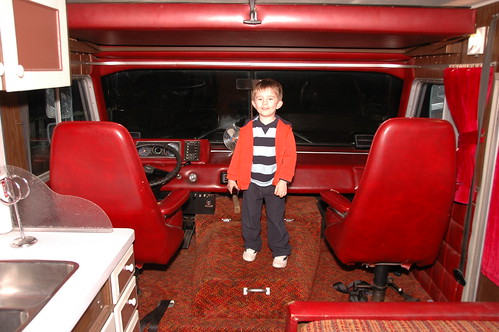
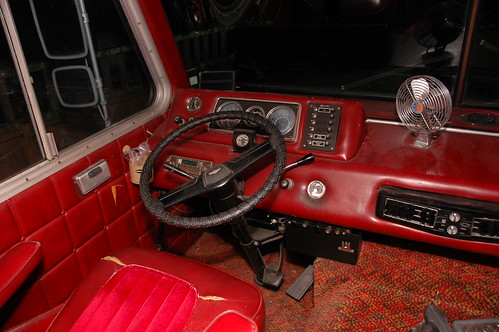
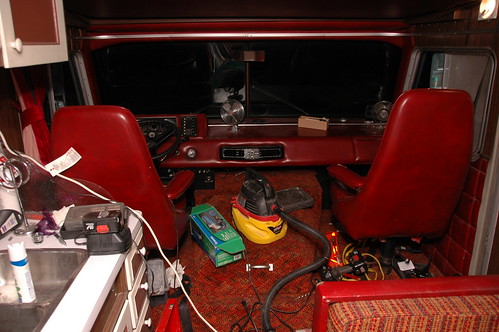
DSC_5422

The cockpit. :)
DSC_5419

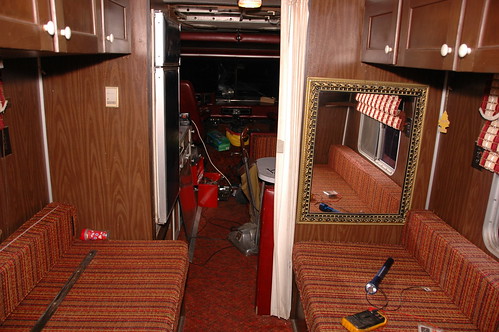
Looking forward to give you an idea of the floorplan... The bathroom is right behind me.
DSC_5430

More of the rear beds.
DSC_5433

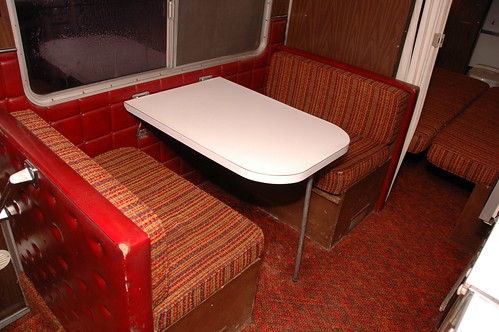
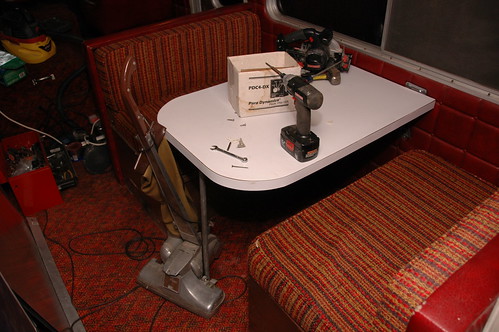
The Dinette also folds down to a bed.
DSC_5435

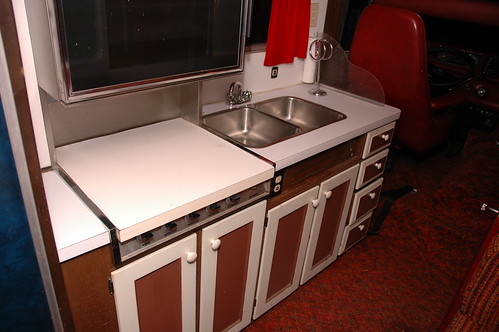
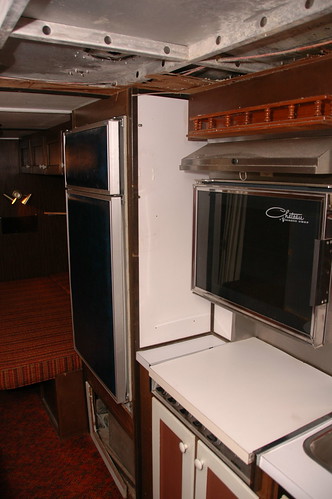
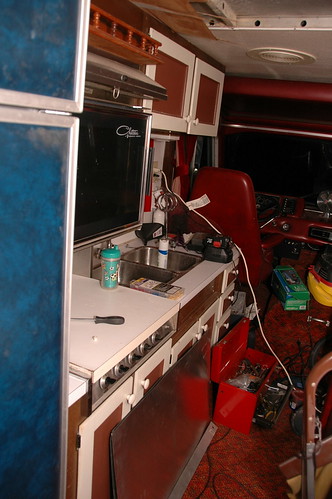
The "Galley" or Kichenette or Kitchen... cool 70's range with Oven on top.
DSC_5436

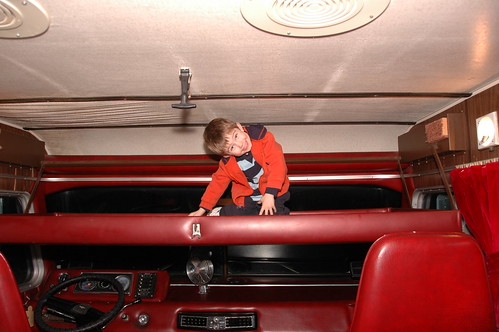
Facing forward, there is a bunk that folds down to just above the headrests of the front swivel chairs. Padded, red like the rest... E Loves it and calls it his new Bonk Bed.
DSC_5437

Stay tuned for more!

These pictures and more are available on my Flickr Set at http://www.flickr.com/photos/mikeblumenstein/sets/72157625823786112/with/5396433503/